
Remove Virtual COM Ports in Geode Connect
UPDATE 8 Aug 2022: Geode Connect version 2.3.0 and later no longer enables or creates excessive virtual ports by default, though may inherit issue from a previously installed version.
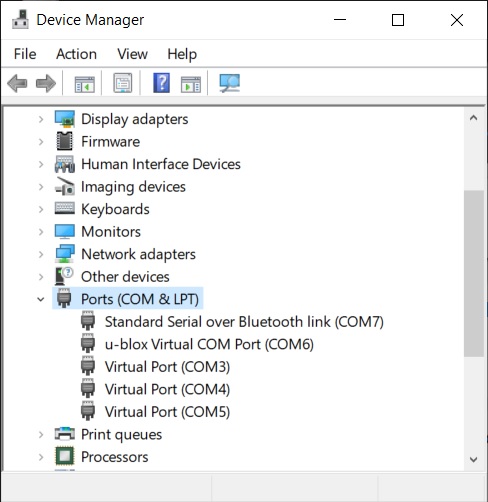
After installing Geode Connect for Windows version 2.2.2 or later (which may come pre-installed on Mesa units), Geode Connect will create three generic virtual COM ports, in addition to the COM port it assigns when discovering and connecting to a Geode, as shown in the following image.
If you are not planning to use Geode Connect as an NTRIP client (see latest Geode manual for details), then you can delete these ports by following the steps below. To learn how to configure virtual ports in Geode Connect, see the Geode manual.
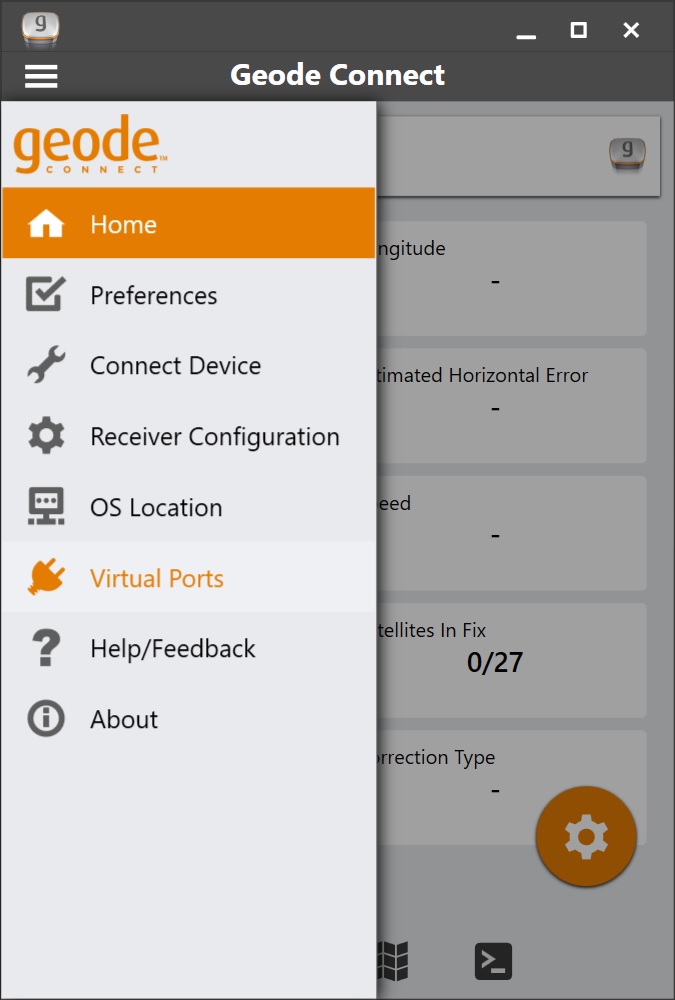
In Geode Connect, open the top-left Menu and select Virtual Ports as shown below.
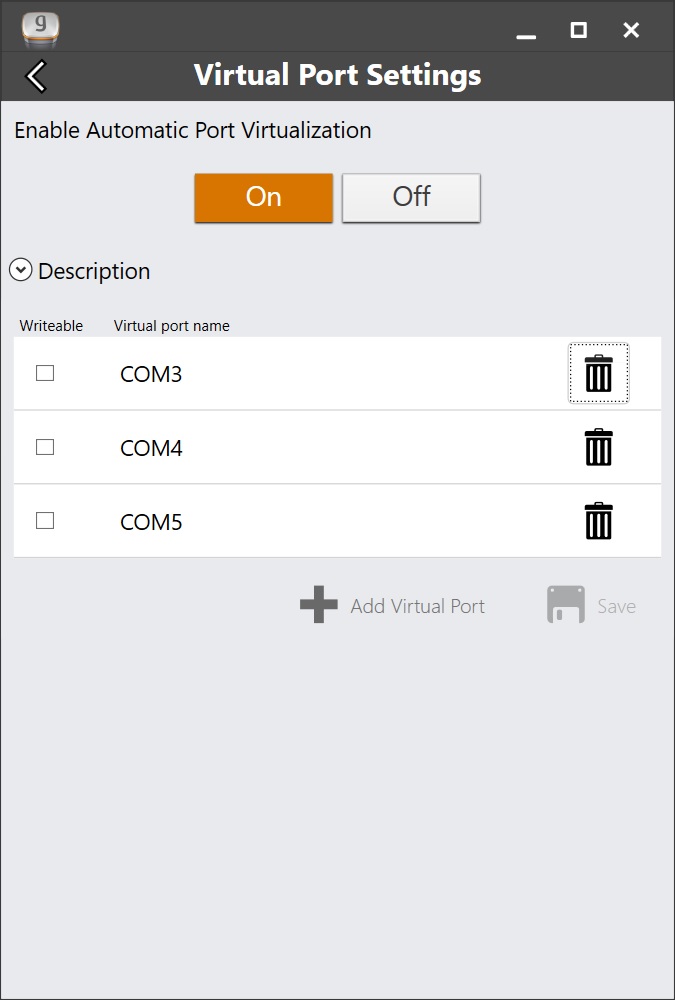
Tap the trash icon next to each port you would like to remove.
Under Enable Automatic Port Virtualization, select Off.
Tap Save.
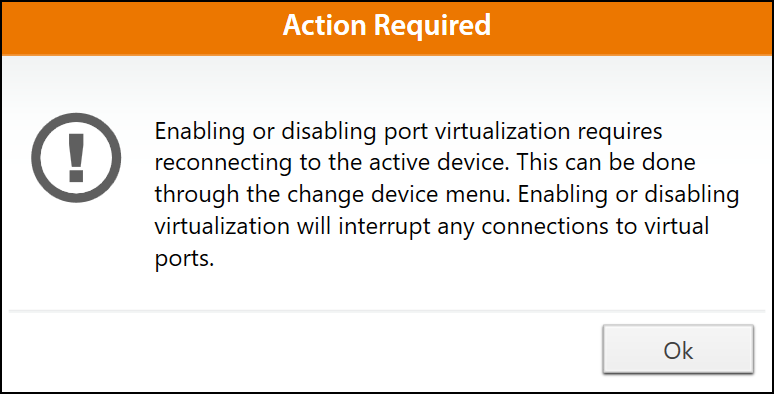
Tap OK when the "Action Required" message appears.
After the changes have been made in Geode Connect, restart your device, then open the Device Manager to verify the COM ports have been deleted.
If you encounter any difficulty with getting the virtual ports removed, see Troubleshooting Removal of Virtual Ports.