Getting Started with Windows 11 on Mesa Pro
Further to the printed guide, this article gives instructions on how to set up Windows 11 on your Mesa Pro. For information about the initial hardware setup, see the Quick Start Guide for Mesa Pro.
When your unit is ready, follow the instructions below to complete the setup. If your unit has a cellular modem and you have inserted a SIM card, see the Cellular Modem Firmware Load Process.
Log in with a Microsoft Account or a Local Offline Account
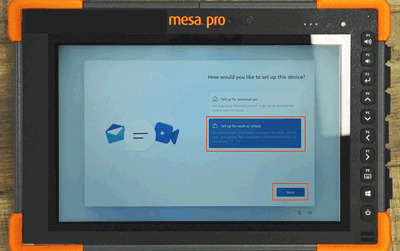
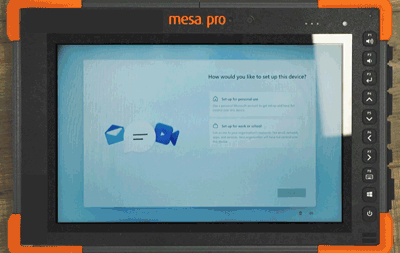
When you use your device for the first time, you will navigate through a series of setup prompts. During this process, you can choose to set up the unit for your personal use or for the use of an organization.
A Microsoft account gives you access to Microsoft services and security features like Find My Device. It also remembers your account settings, allowing personalized settings to follow you from device to device. It is possible to log in without a Microsoft account if desired.
Note: The Windows license only activates after you connect to the internet. After six months of operation without connecting to the internet, Windows displays an activation reminder on the screen.
Set Up for Work or School
Note: If you are using Windows 11 Pro, you must have a Microsoft account and an internet connection to log in.
With a Microsoft Account
To set up with a Microsoft account,
Select Set up for work or school.
Tap Next.
Log in with your work or school Microsoft account.
With a Local Offline Account
If your unit has Windows 11 IoT Enterprise (21H2), you can set up without a Microsoft account by following the steps below:
Select Set up for work or school.
Tap Next.
Tap Sign-in options below the login field.
Select Domain join instead.
Type your name, then tap Next.
Create a password, then tap Next.
If you do not want a password for your unit, leave the field blank and tap Next.
Set Up for Personal Use
With a Microsoft Account
To set up with a Microsoft account,
Select Set up for personal use.
Tap Next.
Log in with your Microsoft account.
With a Local Offline Account
If your tablet has Windows 11 IoT Enterprise (21H2), you can set up without a Microsoft account by following the steps below:
Select Set up for personal use.
Tap Next.
Tap Sign-in options below the login field.
Select Offline account.
On the “What is a Microsoft account?” page, tap Skip for now.
Enter your name, then tap Next.
Create a password, then tap Next.
If you do not want a password for your unit, leave the field blank and click Next.
If your tablet has Windows 11 Pro (22H2), you can set up without a Microsoft account by following the steps below:
Make sure you don't have a SIM card installed in the Mesa Pro.
Select Set up for personal use.
At the prompt "Let's connect you to a network," tap I don't have internet.
Note: If this option isn't available, see Using OOBE Bypass.Tap Continue with limited setup.
Tap Accept.
Enter your name and tap Next.
Create a password and tap Next.
To set up the tablet without a password, leave the field blank and tap Next.
Using OOBE Bypass
If you reset the tablet or have an older OS build, the option to set up without the internet may not be available. You can use the OOBE\bypass command to reboot the tablet and change the setup options.
To use OOBE bypass,
Connect a USB keyboard to the Mesa Pro.
At the "Let's connect you to a network" screen, press Shift+F10.
A command line opens.Tap in the command line, and type oobe\bypassnro.
Press Enter.
The Mesa Pro tablet reboots. Now when you set up Windows 11, you will have the option to set up a local account without the internet.Follow the steps to set up a local account.
Clean Up the Taskbar
The Windows 11 taskbar comes preloaded with several items. The left side of the taskbar can pin applications and comes preloaded with the Microsoft Edge browser, File Explorer, and the Microsoft Store. The right side of the taskbar pins quick settings such as Wi-Fi and airplane mode.
Add Applications to Taskbar
To add applications to the left side of the taskbar,
Open the application.
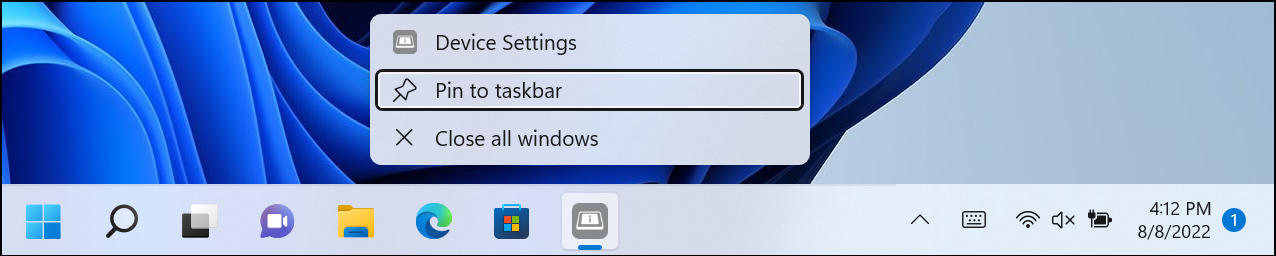
When the icon appears in the taskbar, select it with a two-second hold.
When the pop-up menu appears, select Pin to taskbar.
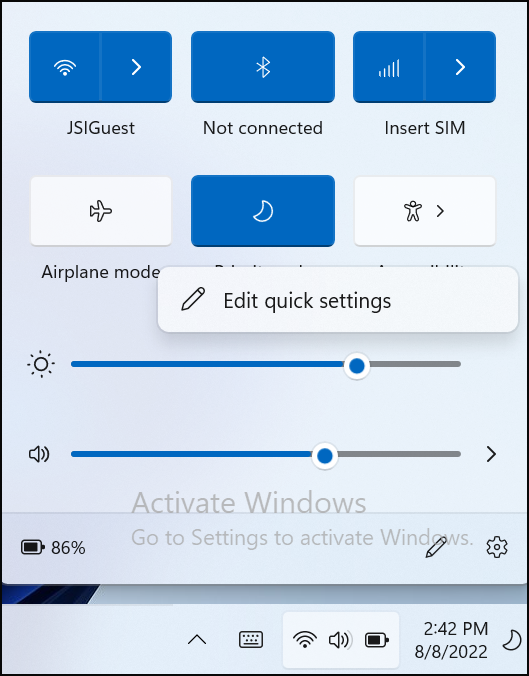
To add applications to the right side of the taskbar,
Select the Wi-Fi, volume, or battery icon.
When the pop-up menu appears, click anywhere inside it with a two-second hold.
Select Edit quick settings.
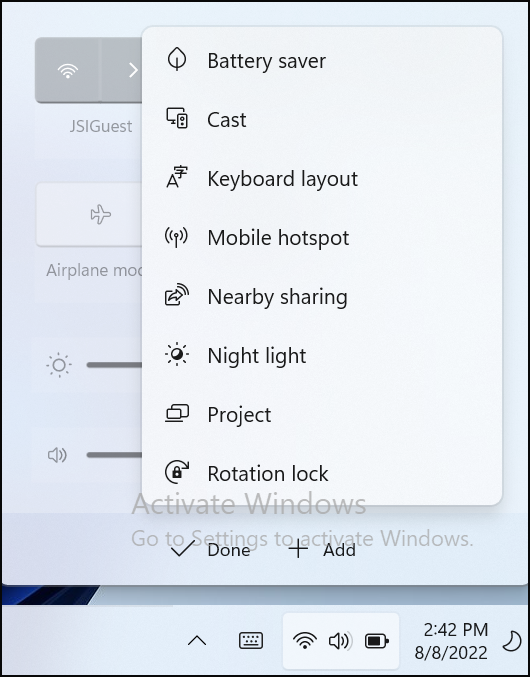
Tap Add. Choose the desired application.
 |  |
Remove Applications from Taskbar
To remove applications from the left side of the taskbar,
Select an application in the taskbar with a two-second hold.
When the pop-up menu appears, select Unpin from taskbar.

To remove applications from the right side of the taskbar,
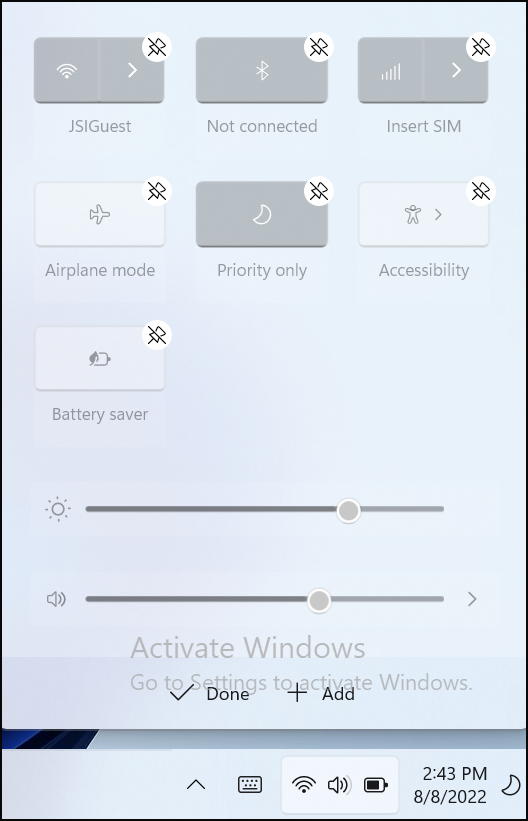
Select the Wi-Fi, volume, or battery icon.
When the pop-up menu appears, click anywhere inside it with a two-second hold.
Select Edit quick settings.
Tap the unpin icon in the corner of the application. Tap Done.
|  |
Windows 11 Updates
Automatic updates are the default setting on Windows 11, but it is possible to turn them off.
Pause Automatic Updates
To pause updates,
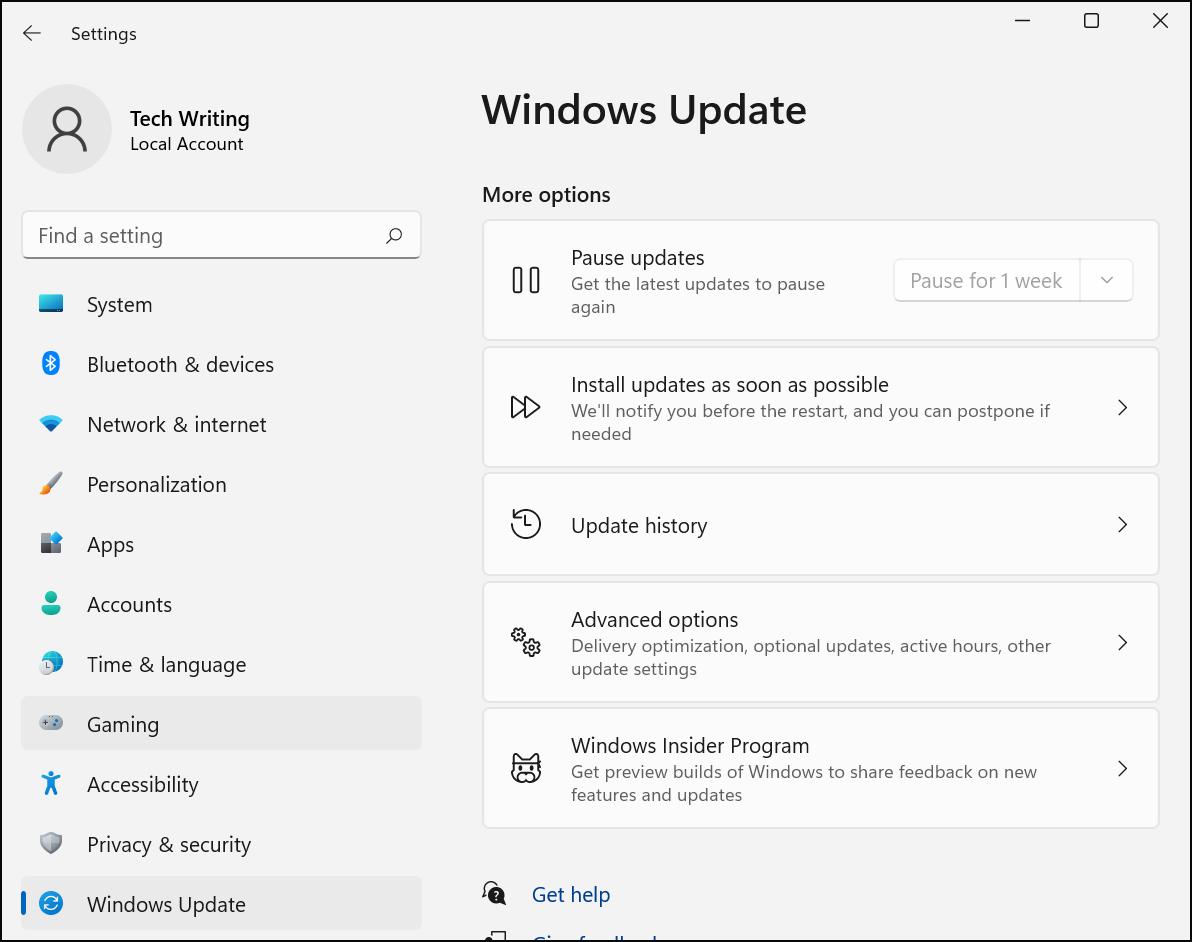
Select Start > Settings > Windows Updates.
Under More options, use the Pause updates drop-down to pause the automatic updates until the desired date.
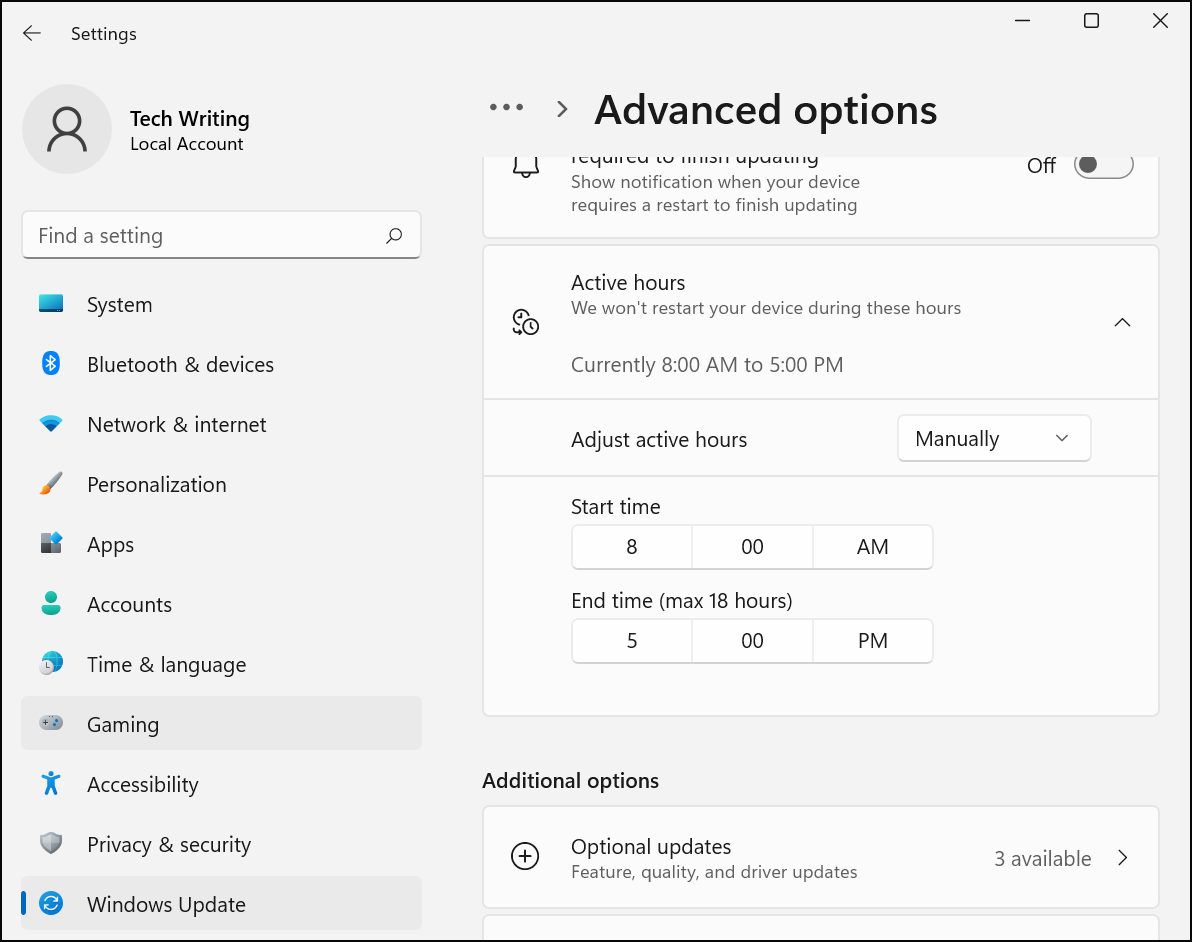
Control Updates
Charge and restart the Mesa Pro each night to give the tablet time to install updates.
If you want to assign specific times for the unit to update,
Select Start > Settings > Windows Updates > Advanced options.
Next to “Active hours,” tap the down arrow.
Next to Adjust active hours use the drop-down menu to select Manually.
Select a range of hours when you actively use the device.
During the hours selected, Windows won’t automatically restart the device, nor will it restart the Mesa 3 without asking if you’re using it.