
Connect the Spire or Geode to Android Devices
If an app can directly connect through Bluetooth to a Juniper receiver, such as Spire or Geode, that works best. (See OS Location Services vs. Direct Connection to a GPS Receiver.) An example is with ESRI ArcGIS apps as instructed at the following web page.
Connect ArcGIS Apps Directly to the Geode on Android Devices
Otherwise, follow the instructions below.
Geode Connect to Bluetooth
Download and install Geode Connect from the Google Play store or the Juniper Systems Geode Downloads webpage.
Power on the Geode.
Make sure Bluetooth wireless is enabled on your Android device.
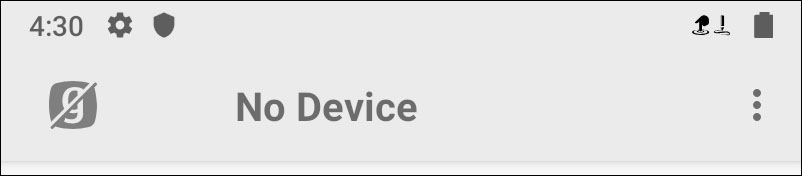
Open Geode Connect.
Tap the Geode icon with a slash through it in the top right corner.
The app will display a list of local Bluetooth wireless devices. Identify your Geode via the serial number printed on its bottom panel. Tap on the name of the Geode you wish to pair with.
Note: If your Geode doesn't show up in the list of devices, check to make sure it is turned on and not paired with another device. Then tap the refresh icon at the bottom of the list of devices.
Follow the prompts to finish pairing the Geode with your device.
After the Geode has been paired to the Android device, you can disconnect from Geode Connect, and fully close/exit the app (by swiping it away and verifying the icon for it is no longer visible at the top, or uninstall it if desired). You can then use the Geode in a data collection app such as those listed at the following web page.
Recommended Mobile GIS Data Collection Apps
Configure Geode Connect as Mock Location Provider
The Geode provides real-time, sub-meter accuracy. However, if your app doesn't provide an option for choosing an external receiver, it may be collecting data via the consumer-grade receiver in your phone or tablet. To collect data via the Geode, you will need to activate it as a mock location provider. This requires you to enable the developer options in the Android OS and configure Geode Connect.
Enable Developer Options in the Android OS
From the Android home screen, go to Settings > About phone (or About Tablet)
Tap Build Number seven (yes, seven) times. This will unlock the Developer options.
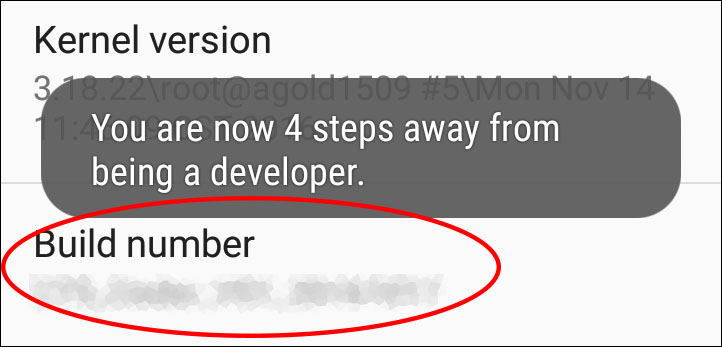
Note: Build Number may not look like you can tap on it. Tap on it anyway. After three taps, Android will prompt you to continue becoming a developer.
Once you are a developer, close Settings and open Geode Connect.
Configure Geode Connect
In Geode Connect, go to Menu > Preferences.
Select the box for Enable Mock Location Provider.
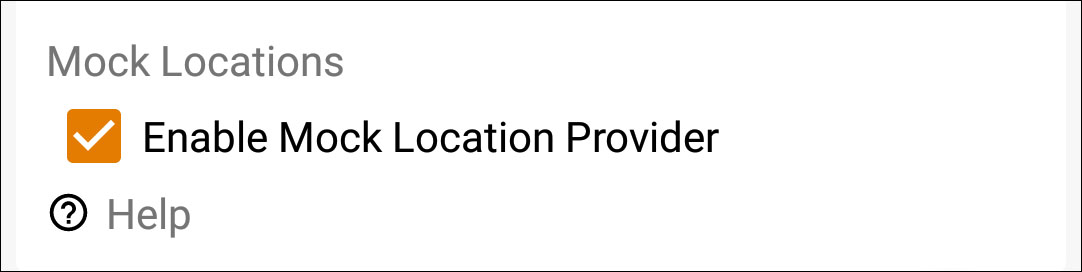
Tap the Save icon.
Geode Connect will prompt you to open Developer Options.
Tap OK.
Geode Connect will open Developer Options so that you can set the mock location provider.
Tap Select mock location app. (In older versions of Android, the option will be Allow mock locations, and it will not ask you for a specific app.)
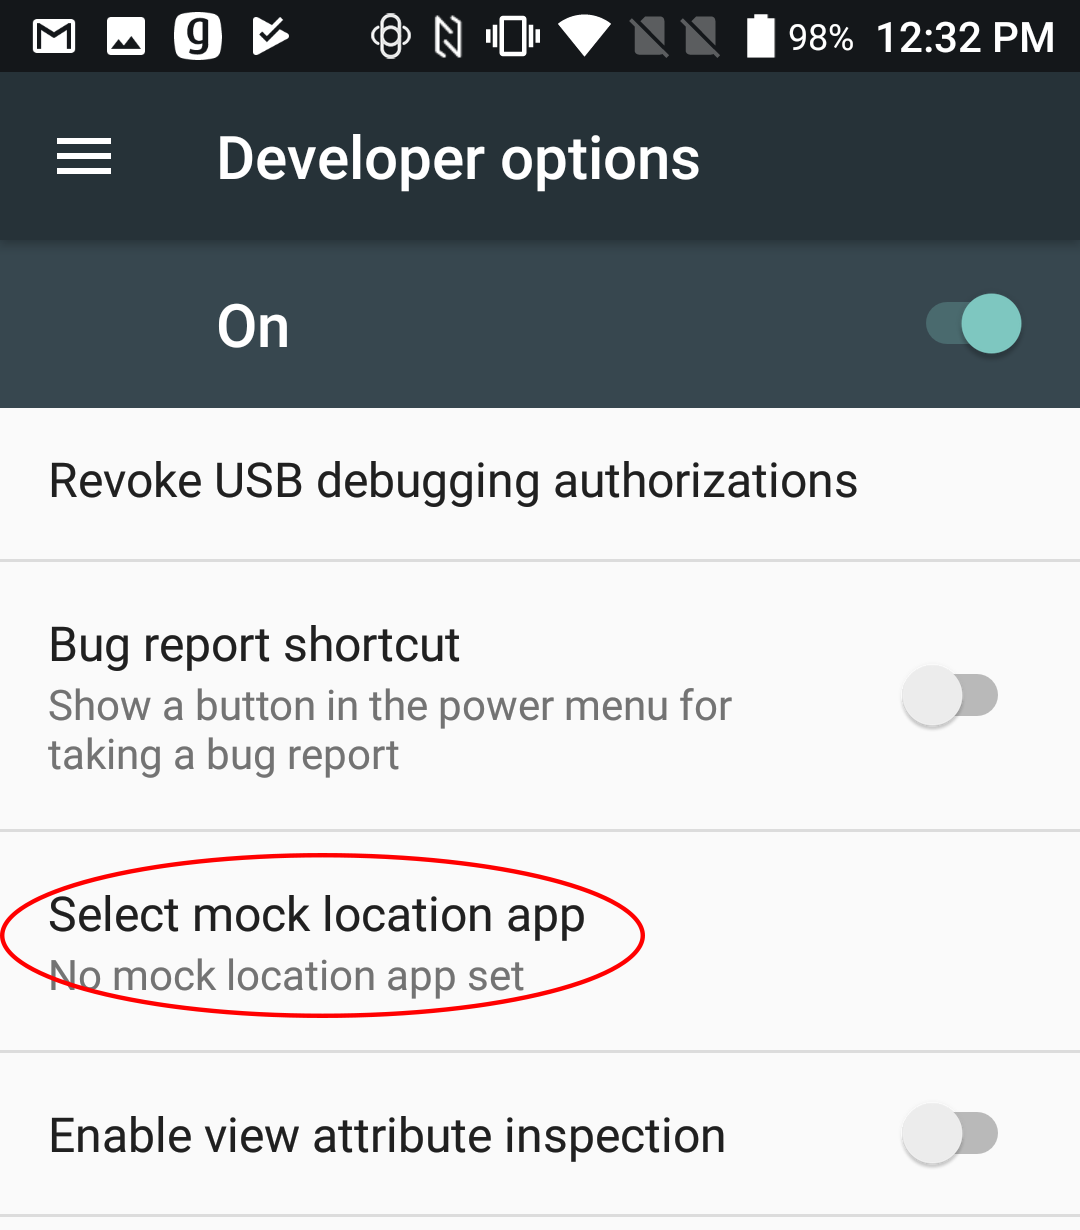
Tap Geode Connect in the list of possible apps.
Tap the Android Back button to return to Geode Connect.
Ensure Improve Location Accuracy is turned off.
In Android version 14:
Go to Settings > Location. Turn on Use location.
Tap Location services. Turn on Location Accuracy. Turn off Wi-Fi scanning and Bluetooth scanning.
In Android version 11:
Go to Settings > Location. Ensure Use Location is enabled.
Under Location, select Advanced > Location Accuracy. Confirm Improve Location Accuracy is disabled.
Under Location, select Wi-Fi and Bluetooth scanning. Turn off Wi-Fi scanning. Turn off Bluetooth scanning.
In Android version 9:
Go to Settings > Security & location > Location. Confirm Use Location is enabled.
Select Google Location Accuracy. Confirm Improve Location Accuracy is disabled.
In older versions of Android, tap Settings > Location > Mode > Device On.
Test Mock Location Provider
Both of the following tests require that the Geode is on and has had time to build its initial almanac, usually 25 minutes after it has been turned on for the first time outside.
One-Person Test
Connect the Geode to your Android device via Bluetooth wireless technology in Geode Connect.
Verify that Geode Connect has been set as the mock location provider.
Leave Geode Connect open.
Place the Geode in one stationary position. Do not move it.
Open your mapping or data-collection app.
Holding your phone or tablet, walk five to ten paces out and then walk in a circle around the Geode.
If the position in the data-collection app does not change significantly (remember, the Geode is just sitting there), the app is drawing its data from the Geode. You can continue to use the app and the Geode without any worries. If the position moves in a circle, the app is drawing its data from your Android device’s internal GPS receiver.
Two-Person Test
One person holds the Geode, and the other person holds the Android device.
Connect the Geode to your Android device via Bluetooth wireless technology in Geode Connect.
Verify that Geode Connect has been set as the mock location provider.
Leave Geode Connect open.
Open your mapping or data-collection app.
The person holding the Android device remains stationary.
The person holding the Geode walks five to ten paces out and then walks in a circle around the person holding the Android device.
If the position moves in a circle, the app is drawing its data from the Geode. Mock location provider is functioning as it should. If the position does not change, the app is drawing its data from your Android device’s internal GPS receiver.
Avoid App Conflicts and Limitations of Location Services
Using Geode Connect as a Mock Location Provider can potentially cause conflicts with other apps that try to connect directly to the Geode. Also, because Mock Location goes through the Location Services of the operating system, this can potentially cause accuracy issues as described at the following web page.
OS Location Services vs. Direct Connection to a GPS Receiver